


TL;DR:
- Setting up a self-hosted WordPress community blog involves registering a domain, choosing managed hosting, installing WordPress, and activating a community plugin like BuddyPress or bbPress.
- Preparations include defining your niche, gathering site details, and setting up registration and moderation workflows to build trust and manage content effectively.
Set up a self-hosted WordPress community blog today: register a domain ($10–15/year), choose managed hosting ($3–10/month), install WordPress.org via one-click installer, force HTTPS sitewide, set permalinks to Post name, and activate BuddyPress or bbPress to open user registrations. Basic setup takes a short amount of time, typically under half an hour, and the WordPress software itself is free. Naijatipsland runs exactly this stack to power its community news forum.
What you need at a glance:
- Domain: under 15 characters, no hyphens, costs vary modestly annually
- Hosting: managed shared or cloud options with modest monthly fees
- WordPress.org: free, self-hosted, full ownership
- Community plugin: BuddyPress or bbPress (both free)
- Time to basic launch: a brief technical setup typically under half an hour
Table of Contents
- What should you have ready before the technical setup?
- How do you complete the step by step blog setup?
- How do you build a pillar page and supporting content cluster?
- How do you set up registration, moderation, and submission workflows?
- What does your launch checklist and first-week promotion look like?
- What are the ongoing costs, security tasks, and 12-week timeline?
- Key Takeaways
- Why Naijatipsland prioritizes speed plus verification over perfection
- Useful sources and next reading
What should you have ready before the technical setup?
Skipping this step is why most setups stall. Gather these before you open a hosting dashboard.
| Item | What to prepare |
|---|---|
| Domain name | Under 15 characters, .com or .ng preferred, WHOIS privacy enabled |
| Budget | Modest monthly hosting cost plus an annual domain fee |
| Site identity | Name, 1–2 sentence purpose, logo or wordmark, admin email |
| Core features list | User registration, comments, submission form, RSS aggregation |
| Account access | Payment method, password manager entry for host credentials |
Your site purpose should fit one sentence: “A community forum for Nigerians to share and discuss entertainment, politics, and current affairs.” That single line guides every plugin and content decision that follows.
How do you complete the step by step blog setup?
Follow these steps in order. Each one builds on the last, so resist jumping ahead.
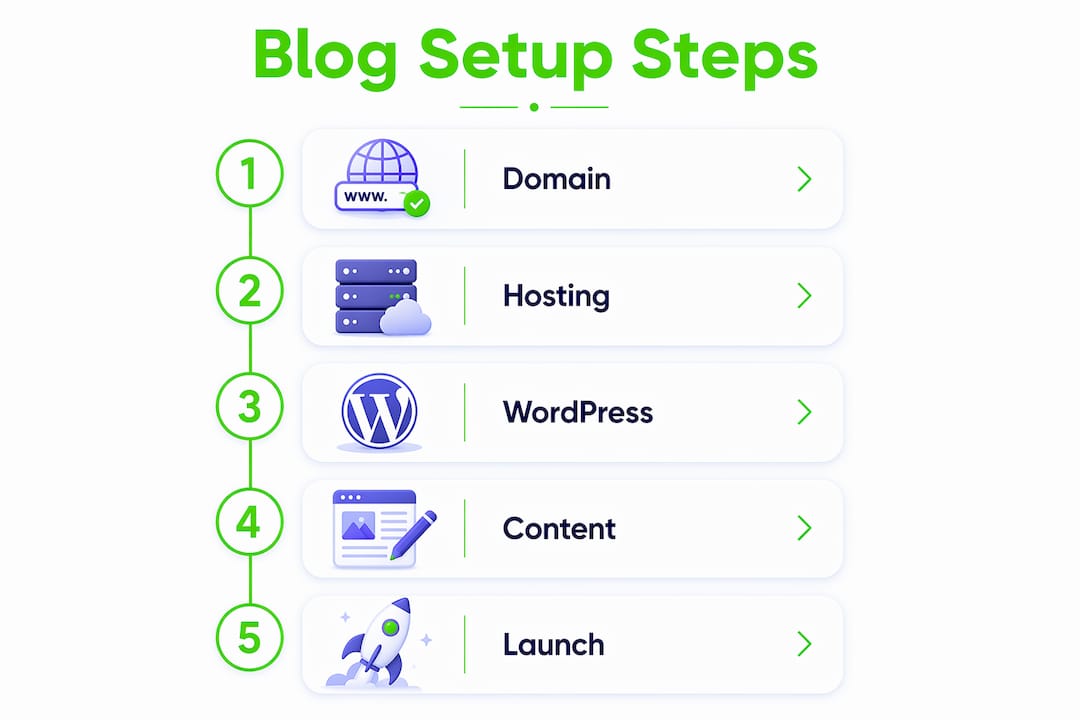
Lock in your niche and pillar topic. Define one clear community focus — Nigerian entertainment roundups, Lagos politics, Afrobeats news — so your content structure and plugin choices align from day one.
Register your domain. Use a registrar or your host’s built-in tool. Choose a .com or .ng TLD, keep it short and memorable, and enable WHOIS privacy immediately after purchase.
Choose managed WordPress hosting. Entry-level managed options like SiteGround and Cloudways give you automatic backups, SSL, and staging environments. Bluehost is a common beginner choice for budget shared hosting. Any of these support one-click WordPress installs.
Install WordPress.org via your host’s one-click installer. Log into your hosting dashboard, find the WordPress installer (often labeled “Softaculous” or “Website Installer”), select your domain, set a strong admin username and password, and click Install. You’ll receive a link to wp-admin within minutes.
Force HTTPS sitewide. Enforce SSL from day one — partial SSL setups create mixed-content warnings that damage both trust and search rankings. Most managed hosts activate SSL automatically; confirm it under your host’s SSL settings and set WordPress Address to https:// in Settings → General.
Set permalinks to Post name. Go to Settings → Permalinks and select “Post name.” Changing this later breaks existing URLs and requires redirects, so do it before publishing anything.
Choose a lightweight theme. Install a fast, mobile-first theme from Appearance → Themes. Keep your plugin count minimal at launch — a clean default theme loads faster and reduces conflicts.
Install your core plugin set. A focused plugin set keeps the site fast: one community plugin (BuddyPress for social profiles and activity feeds, or bbPress for threaded forums), one SEO plugin (Rank Math works well), one caching plugin, and one backup solution. Add nothing else until you have real traffic.
Configure user registration and profiles. Go to Settings → General and check “Anyone can register.” Set the default role to Subscriber. In BuddyPress or bbPress settings, enable email verification, add profile fields relevant to your community (display name, location, bio), and set first-time posts to require moderator approval.
Publish your About page, Contact page, and first pillar post. Delete WordPress’s default sample content, then publish these three pieces. Your first pillar post signals to search engines what your community is about.
Pro Tip: Self-hosted WordPress.org gives you full ownership of your data, community features, and monetization options — hosted free platforms do not. Own your platform from day one.

How do you build a pillar page and supporting content cluster?
A single pillar page paired with 5–8 supporting posts forms a topical cluster that helps search engines and AI systems understand your site’s authority. For a Nigerian community news site, this structure also gives new visitors a clear map of what you cover.
How to build the cluster:
- Pick one broad pillar topic (example: “Lagos Entertainment Roundups”) and write a comprehensive overview page.
- Map 5–8 supporting posts that answer specific questions within that topic: “Top Afrobeats releases this week,” “Where to watch live Lagos concerts,” “How to submit your event listing.”
- Link the pillar page to each supporting post, and link every supporting post back to the pillar. This tight internal loop signals topical depth.
- For submission-driven posts, include the submitter’s name, source links, and a visible moderation note at the top.
“Build your site around a single pillar page linked to several supporting posts; this internal linking pattern helps search engines and AI understand topical authority.” — Blogging Titan
For a community news format, keep aggregated briefs short (150–250 words), add original commentary, and include a moderator or author signature on each post. Calls to register or submit tips belong at the bottom of every supporting post. Naijatipsland’s news article submission guide shows exactly how this attribution workflow looks in practice.
How do you set up registration, moderation, and submission workflows?
A healthy community needs clear rules enforced from the start. Here is the recommended flow.
Registration flow:
- Require email verification before any account is activated.
- Collect minimal profile fields at signup: display name, email, and optional location.
- Set new accounts to Subscriber role by default.
Moderation defaults:
- Pre-moderate all posts from first-time contributors before they go public.
- Auto-flag comments containing high-risk keywords using Akismet or a similar filter.
- Require at least one moderator approval for new accounts before they can post publicly.
- Add CAPTCHA to the registration form to block bot signups.
Content submission workflow:
- User submits via a front-end form (Gravity Forms or WPForms work well).
- Submission creates a draft post with submitter name auto-populated in a custom field.
- Editor reviews the draft, verifies sources, and adds a moderation note.
- Editor publishes with full submitter attribution visible.
Roles and permissions:
| Role | Capability |
|---|---|
| Reader | View content only |
| Registered Member | Comment and submit tips |
| Contributor | Submit draft posts |
| Moderator | Approve, edit, and flag posts |
| Editor | Publish, reject, and manage all content |
Pro Tip: Post your moderation rules publicly on your About or Community Guidelines page. Transparent rules reduce disputes and build trust faster than any design tweak. See Naijatipsland’s comment moderation guide for a practical template.
What does your launch checklist and first-week promotion look like?
Launch is not a single moment — it is a short sequence of verifiable steps.
Pre-launch checklist:
- Verify site in Google Search Console and submit your XML sitemap.
- Test the site on mobile and confirm SSL is active on every page.
- Check that permalinks are set to Post name.
- Schedule your first three posts to publish on days 1, 3, and 5.
- Confirm registration and email verification work end-to-end.
First-week promotion tactics for Nigerian communities:
- Share your launch post in relevant WhatsApp and Telegram groups.
- Post to your personal profiles and ask early contributors to share.
- Pin a “Submit your tip” call-to-action at the top of your homepage.
- Repurpose your pillar post as a shareable summary card for Instagram or X.
- Engage two or three niche influencers and invite them to contribute a post.
Track early signals in Search Console (impressions and clicks), monitor your registration rate, and note your submission-to-publish ratio. These three numbers tell you whether your community is growing or stalling. For a deeper look at growth metrics, Naijatipsland’s engagement metrics guide covers what to watch in the first 30 days.
What are the ongoing costs, security tasks, and 12-week timeline?
Estimated recurring costs:
- Hosting: $3–10/month (entry-level managed)
- Domain: $10–15/year
- Premium plugins or backup storage: optional, varies by provider
Weekly and monthly maintenance tasks:
- Update WordPress core, themes, and plugins every week.
- Run automated backups daily; store copies in at least two locations (local + cloud).
- Review and clear spam comments weekly.
- Run a security scan monthly using your security plugin.
Security essentials: HTTPS on every page, strong unique admin credentials, a web application firewall (Wordfence or Sucuri are widely used options), and a tested restore process. The 3-2-1 backup principle — three copies, two storage types, one offsite — is the standard for disaster recovery.
12-week timeline:
| Weeks | Focus |
|---|---|
| 1–2 | Technical setup, theme, plugins, first pillar post |
| 3–4 | Publish initial cluster (5–8 supporting posts) |
| 5–8 | Submit sitemap, run promotion, gather first contributors |
| 9–12 | Refine moderation rules, add features based on real feedback |
Key Takeaways
A complete community blog setup requires a domain, managed hosting, WordPress.org, a community plugin, and a pillar content cluster — all achievable in under a week with a $3–10/month budget.
| Point | Details |
|---|---|
| — | Buy domain ($10–15/yr), sign up for hosting ($3–10/mo), install WordPress.org, enable SSL. |
| First settings | Set permalinks to Post name before publishing anything to avoid broken URLs later. |
| Community plugin | Install BuddyPress or bbPress, enable email verification, and pre-moderate first-time posters. |
| Content structure | Publish one pillar page plus 5–8 supporting posts linked to each other for topical authority. |
| Weeks 2–8 | Submit sitemap to Search Console, promote via WhatsApp/Telegram, and iterate moderation rules. |
Why Naijatipsland prioritizes speed plus verification over perfection
Most guides tell you to get everything right before you launch. That advice stalls more community sites than any technical problem ever does. The fastest path to a working blog is publishing an imperfect first post and iterating — and that principle applies directly to community moderation too.
At Naijatipsland, the submission workflow is deliberately simple: a contributor submits via a front-end form, the submission lands as a draft with the submitter’s name attached, an editor verifies the sources and adds a short moderation note, and the post goes live with full attribution. No submission sits in a queue for days. Speed matters because community members lose interest fast when their contributions disappear into a black box.
The real tradeoff is not speed versus accuracy — it is staged trust versus blanket restriction. New accounts get tighter moderation; established contributors get faster publishing. That graduated model scales without requiring a large editorial team. You can review the full submission process Naijatipsland uses as a starting template for your own workflow.
Useful sources and next reading
The claims in this guide draw from the following sources. Use them to verify specific steps or go deeper on any section.
| Source | What it covers |
|---|---|
| WPZoom — How to Start a WordPress Blog | Setup time (15–20 min) and cost estimates ($3–10/mo hosting, $10–15/yr domain) |
| Blogging Titan — How to Start a Blog | Pillar + cluster strategy, permalink rules, HTTPS enforcement |
| Elementor — How to Start a Blog | Self-hosted WordPress.org ownership and platform control rationale |
| TechJury — How to Start a Blog | Minimum Viable Blog philosophy and beginner encouragement |
| WP Troubleshoot — WordPress Setup Guide | Focused plugin set, backup best practices, minimalist setup |
| Naijatipsland — Submission workflow | Real-world tip submission and editorial verification process |
For platform-specific installation steps, consult your host’s official documentation and the plugin docs for BuddyPress, bbPress, or Discourse (a self-hosted forum alternative worth considering once your community grows past the initial phase). Naijatipsland’s Nigeria-specific launch guide covers localized hosting and promotion considerations not addressed in US-focused tutorials.